1.png)

Process
Mud Culture is all about the importance of material, process, and connection to our substrate
What makes Mud Culture Studio unique?
Our work is made with hand gathered materials. We collect rocks, river silt, metals, plants, wood ash, and other natural objects, and process them to be used in our ceramic works. These materials are used as glazes, claybody additives, and texturing moulds, and become transformed into a useable ceramic objects. We collect these materials from places close to the demographic we sell to. Many of our collection sites are within the Columbia River watershed and surrounding mountains.
Being able to use local materials involves many more steps than purchasing pre-made ceramic minerals and glazes. Below is a short summary of what it takes to create a 100% locally sourced and unique glaze.
-
Physically researching areas (hiking, driving) to look for usable mineral
(This requires some geology knowledge and lots of learning to identify types of rocks and deposits). -
Digging and carrying out rocks, sand, silts and bringing them to the studio (backpack full of rocks and sand).
-
Processing the material so it can be tested. This takes a lot of effort and time
(bisque firing to make rock brittle, using hammer to smash rocks into grit, ball milling to grind grit into fine powder, seiving, weighing, mixing). -
Testing to make a suitable glaze or claybody addition
(mixing small amounts of varying proportions and firing multiple test-tiles, learning how the material reacts to thickness, temperature, and other mineral amendments). -
Mixing and seiving a large batch of glaze.
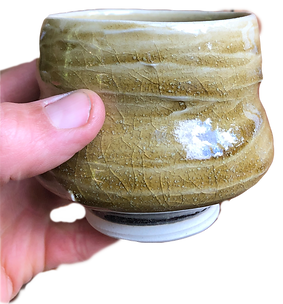
Making our Limestone
Riversilt Glaze
Journey with us as we create one of our favourite glazes.


01
Collect
Hiking down to the river with shovels and containers. We must go at the right time of year when the river is low enough so the seasonal silt flat is accessible. This is usually between August and October.

02
Seive
To remove rocks and roots, I seive the river silt through two sets of seives. The silt must be mixed with enough water to pass through the sieve.


03
Dry
The silt must be dried so it can be weighed accurately for testing and mixing with other minerals. The silt is poured onto large plaster slabs which absorb the moisture over several days. Best done during a sunny warm week. When it is dry, it is crumbled up and pounded to a powder for future use.
04
Test
When I first used this material in its raw form, it was challenging and unpredictable to use as a glaze as it would drip and bubble, making it not suitable to functional pottery. I needed to amend it with other minerals to help it reduce dripping and to not bubble. Through research I learned to amend it with a ratio of Silica (Quartz) and Potassium Feldspar. To find the best ratio, I need to do a tri-axial blend between the three minerals, which involves mixing many small batches with different proportions of Silica, Feldspar and River Silt.

05
Fire
The tests and raw material are fired in the ceramic kiln, which is heated by electrical elements, much like an oven, except it heats to 1285 C in order to melt the minerals and vitrify the claybody. This takes about 6-9 hours to heat up, and then a day to cool. The glaze transforms from a grey powder into a glassy glaze! Now we can observe the results of each test and decide which recipe/ratio of minerals we will use to make a large batch of glaze. This testing process is often repeated more than once when first developing a glaze.
06
Glaze
Once the large batch of glaze is mixed in a bucket with the right amount of water, it can be applied to bisqueware (clay that has been fired once to 1000 C). The glaze is applied by pouring, dipping or brushing. The glazed bisqueware is loaded back into the kiln and then fired to 1285 C, and unloaded the next day.
